|
In a previous post, I wrote about "quick & easy" steps for making whiteboard videos for college and university instruction using Explain Everything. Here are some additional steps that can provide more structure to the process and content while also optimizing the experience for your students. The areas to be discussed include:
Prepare a scriptI admit that I often like to ad lib and be spontaneous in my live instruction. And even with some of my whiteboard videos, I like to be informal and conversational. Sure, I will jot down some talking points on a post-it note or text file on my computer, but I don't necessarily always think about the precision of what might come out of my mouth. Often, however, when I listen back to what i have said there are way more pauses, "uhh"s, "um"s, and "you know"s than I think are helpful to the viewer/listener. Taking the additional time to write out a script accomplishes many things:
 Stage visual assetsI like to prepare slides in tools like Powerpoint and Keynote, but I do so in such a way that if I know that I'll be speaking to them (live or video), I won't try to jam all of the words and ideas onto the slide. Instead, I want what is visualized and what is spoken to be complimentary to each other. In addition to the backdrop slide, I like to prepare the things that I might want to add on to the stage as I am speaking. I could do this as staged builds within Powerpoint or Keynote, but I prefer to have some independence with the objects so I can move them around more naturally. I'll usually setup a folder that not only contains a PDF of my slides but also any additional artifacts (a PDF, an image, a Video, etc.) that I plan to add and make sure it is in a place I can access from Explain Everything (desktop folder, GDrive, Dropbox, etc.).  Record audio then visualsFirst, I'll create a project and import my backdrop slides as separate pages in Explain Everything. Then, using my script, I'll record the audio for each slide without worrying about any visuals or animations. I can really focus on my words and pacing. Next, I'll rewind and MUTE my microphone. This is where the Mix mode of Explain Everything becomes really powerful. I can add visualizations while listening to myself speak. I can also pause, add something to the canvas, and then resume recording visuals. This will make it seem like things are instantly appearing to the viewer. I'll add objects and annotations to each of the slides of my recording after first recording my talk track. There are a lot of timeline editing options, such as removing dead/quiet space at the start or end of a video that you can learn more about at Explain Everything's Help Center. 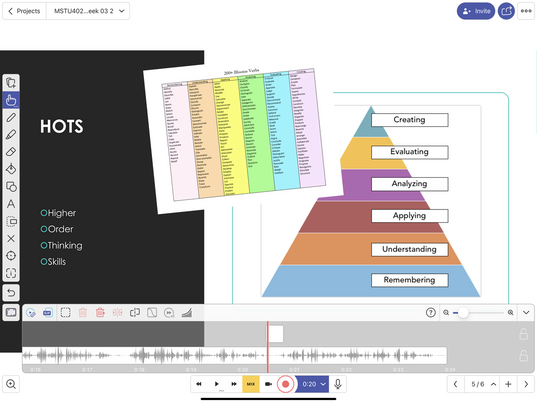 Export and publish videos in chunksIt is possible to quickly generate a shareable URL that will show all of your recorded slides in a single, stitched together video. However, it can be very helpful to your viewers to separate longer videos into chunks. It requires a few additional clicks on your part, but reduces the effort for all of your students (however many there may be). 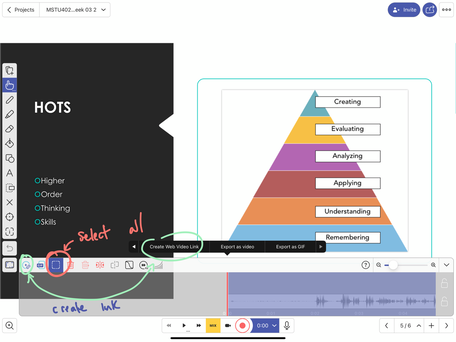 First, open up the timeline and rewind to the beginning. Then, press the Select area button and scrub to choose the entire timeline. Finally, choose the 'Web Video Link' button. It will generate a unique URL for just the video content of the selected area. This is the URL you can copy and paste to your Learning Management System. If your video has 5 sections, you'll have 5 URLS (here is where naming can be helpful). 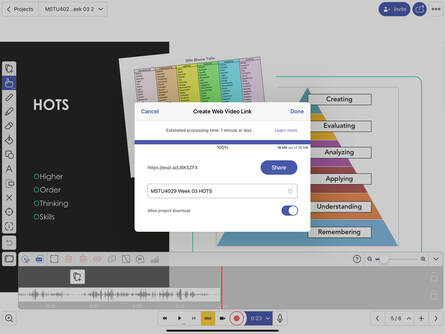 Below is what it looks like in my Canvas course page editor just before I'm ready to hit save, and this link will take you to the entire video stitched together. 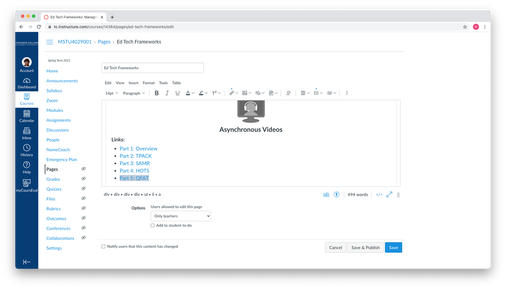 Free WebinarI'll be hosting a free webinar on this topic on Wednesday 1/13 at 4PM ET. Sign up below!
0 Comments
Your comment will be posted after it is approved.
Leave a Reply. |
 RSS Feed
